Google+ My Python Projects: Regular Google+
Showing posts with label Regular. Show all posts

Wednesday, September 11, 2013

Raspberry Pi

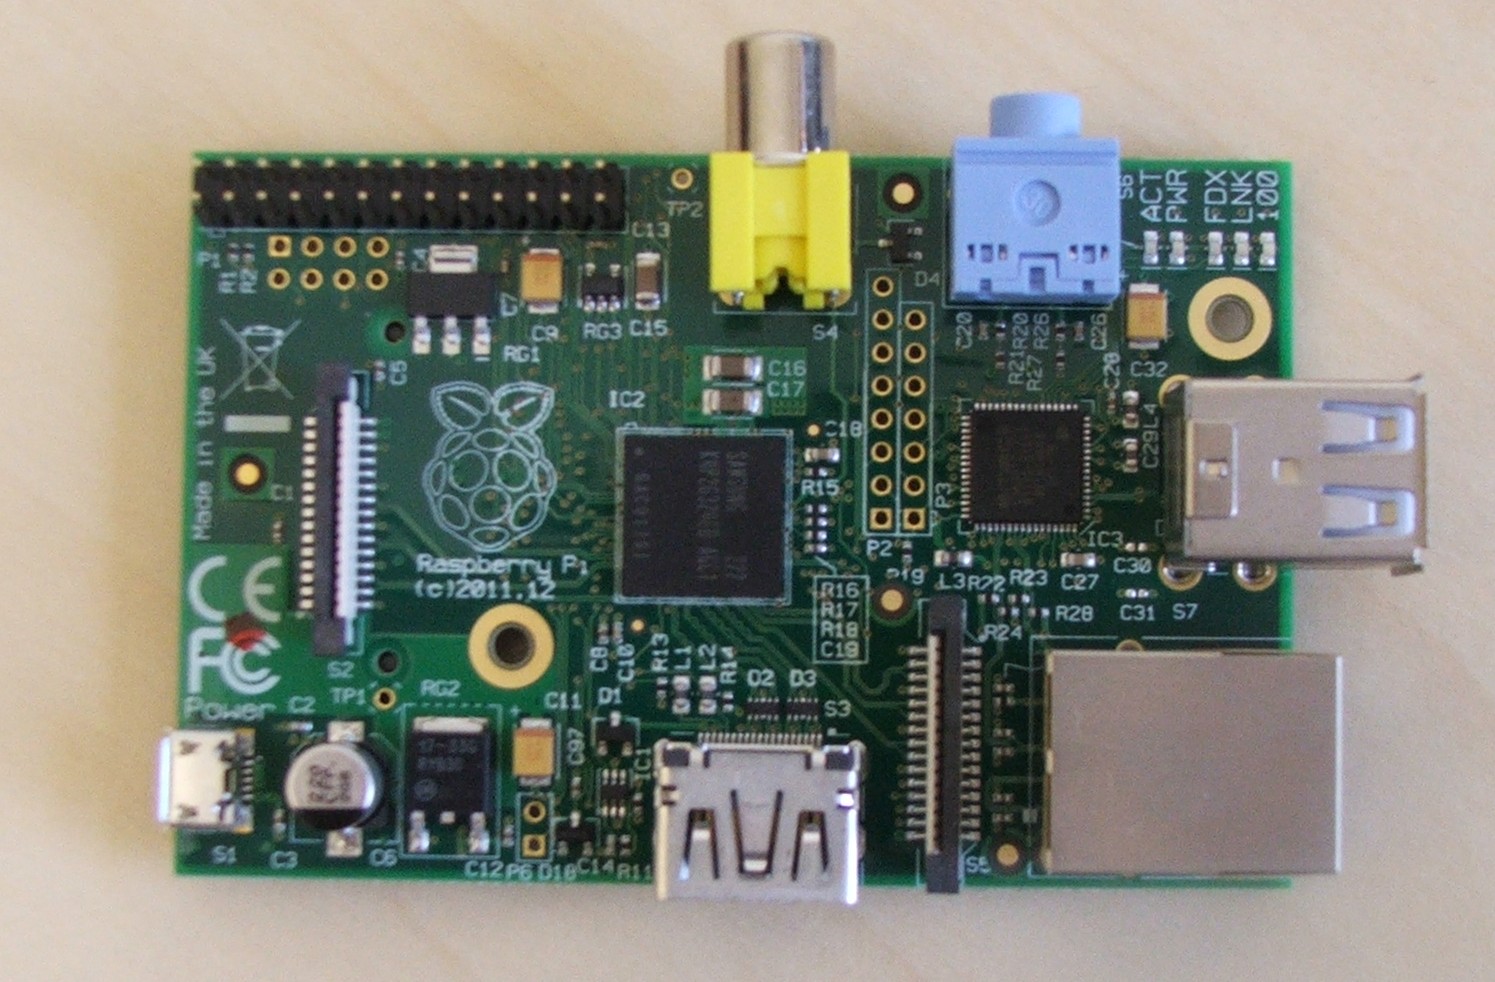
Hurray I have a Raspberry Pi now :)

Hi everyone,

      I am very pleased to inform you that I have a Raspberry Pi now.It was a dream of mine to have a Raspberry Pi of my own.

For those 'stone age' people who don't know what a  Raspberry Pi is ( No offence :p )
Just check out YouTube for Interesting Projects in Raspberry Pi.And Google it for more details on it.This blog wouldn't enough to describe it.


 From now own this blog will also discuss about my projects on Raspberry Pi.

Tuesday, September 10, 2013

Draw in the air with OpenCV Python:Part II(Explanation)

Note: This explanation  is written for people who have little experience in Image processing techniques.It may sound trivial to many of you out there.Sorry for the inconvenience,if any.

The essence of this project' idea is the color thresholding to differentiate objects in the frame.Using color thresholding we map the original(color) frame into a binary frame where the pixels with our color of interest is mapped into pixels with one value(1 or 255) and all other pixels with another value(0 or zero). In our little project the binary frame is shown in the window 'Eroded',and you may notice it as black/white image.

Let us start with color space,the color space used in this project is the HSV(Hue.Saturation and Value) or HSI.Which is also a 3 channel color space like the popular RGB many of you know.

Here is the color space visualized using a cone.

You can know about this more in wikipedia.

What's important is the fact that it is more immune to lighting variations when compared to the ordinary RGB color space.That's one of the reason why we use this non-linear color space in this project.The other reason is that its convenience,that you will understand later.

In OpenCV instead of the usual ranges of HSV values used commonly, it follows a slightly different set of range for values of H,S and V.

H --> 0 to 180 (instead of 0 to 360)
S --> 0 to 255
V --> 0 to 255

In the first stage of this program we threshold the acquired frame based on the color of the object with which we like to draw in the air(in front of the camera of course). So we use trial and error to find out the maximum and minimum HSV set of our object of interest.The object with red color is a little bit trickier because its HSV set covers both the higher end(-->180) of the Hue as well as Lower end(-->0).In this case we would have to check for both conditions by using an 'or' logic in 3rd line of 'preprocess' method.

So the cv2.inRange() do the trick for us.It returns 255 to the thresholded image for each corresponding pixel in the actual frame which have the HSV values in the range between blue_low and blue_hi(these are just variables) and other pixels are set to 0.

What we now have is a binary image which represent the places in which we have our color of interest(in my program its blue).

In the resulting binary image we can see one/many cluster(s) of pixels which have threshold value of 255(white in color).These will be called as 'Blobs' from now on.

If the captured frame is too noisy we can see many white dots in the thresholded frame.These create a lot of problems, and our aim is to minimize these noisy blobs.For that we select the blobs which possess particular range of Aspect ratio and Area(which have maximum values just above the dimensions of our object and minimum value just below the dimensions of the object). This is what I have done using the conditional statements in 'segment' method.And this method also draws rectangle around the valid blobs(which 'survives' the segmentation based on the area and aspect ratio constraints).And also returns the center pixel co-ordinates of the first blob which satisfies the constraints.


The center of the object(in the current frame) is thus obtained,and a line drawn between the previous center(obtained from previous frame) and the current center.Thus it gives an effect that these lines follow the path of the object.

Note : Since we are taking the center of the first blob which satisfies the constraints the drawn path may deviate from the actual path of the object if the noises are large enough and pass the constraints first.

The Pygame Part

Here I have used the pygame module to draw the path of the object in the screen.The pygame.draw.line() draws a line between the to pixel co-ordinates specified inside the argument list.The first parameter is the window in which it has to be drawn and the second is color in which the line has to be drawn(in RGB format) and the last two are the pixel co-ordinates.


So that's it.If you want more explanations or wish to give a feedback please comment here.

Wednesday, July 24, 2013

Draw in the air with OpenCV Python : Part I

This post discusses crude but a simple project to familiarize with OpenCV a bit more.

This post will present the code and the next post will give the explanations.

Introduction

This is a small and simple project I did yesterday within a hour or so.Though you may find many applications for this.

The Idea of this project is to trace the path of a object based on its color and draw it on the screen.

Requirements:
  • WebCam,
  • cv2(OpenCV), pygame, numpy python modules correctly installed
  • A specific colored object(I will use a Blue one)
  • A background with color other than the objects color.

Program:

download as text tracepath.py.txt

You can run this script blindly with a blue colored object and draw whatever you want in front of your webcam to have fun.I will be posting the explanations as a seperate post since, its a bit large and requires some time for me prepare it.So keep visiting the blog and I will catch you soon with the next post.

Sunday, July 21, 2013

Play Audio using Pygame

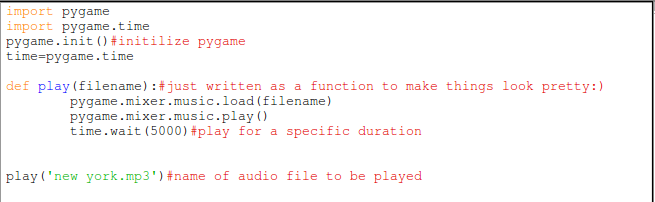
Your projects may require python play audio for you based on some events in the program,Pygame comes to the rescue.Although Pygame can do much more we will restrict ourselves to just playing audio here,apart from that pygame is the only module which I found do the job for me.

Download pygame from here for your OS of choice(select correct version of python).

download as text play_audio.py.txt
The time.wait() is here used for controlling the duration for which audio is played,and it takes the duration as argument in milliseconds(ms).

Pygame library can handle most of the famous audio formats mp3,wav,ogg etc...

That's it for now:) Comment if want more.

Friday, July 12, 2013

Let's do something cool with Python : Cypher

No,I am not going to start with how to print 'Hello World' on screen using  Python,You might have seen that a lot,if not you still haven't read any articles which teaches you python(So go back and check out my previous post)

So let's do something simple but cool thing with Python...

What is a Cypher?


Cyphering/Encryption is a way of writing secret messages.

Can you recognize what I have written below?


HL BLF PMLD GSV NRIILI XBKSVI

Yes, the nuclear launch code !  just kidding

This is a mirror cypher.

Mirror Cyphering using Python


In a mirror cypher the characters in the original text are replaced by it's mirrored character like A by Z, B by Y and so on... Looks simple eh? try decoding this on your own:

JBDBTU YQY QE YFTD BUHBH ZYZLHU KHEHZUZE HXHEPST BZ UZHUEYB UZFBDEUHSW UHEPQYWE HQEQ DVGBKJK HQWEMMEO ZKZILTTP WSTZUZSFSHZQ HW EMK DVFU BSEZE ZGVUZHY EHY ESHGFZH WU YZFDIG JILJK UYW EZQTBTJ DU DJ SRUTUWTEJTREEE WWBDTBW TWT WBUTWGXJZE SUWHGJZRMEMUJRDVURLITW TLZVITEJY UDUTLREOVRT BDUTTVJ UJGJJLIVOLV SZUDVGUWEX UJZJZJKEY BVWTUEVBLHW JDULEVS

Don' waste your time,python to the rescue(this is what programming languages are for,doing repetitive tasks)


And here is my mirror.py program:


download as text mirror.py.txt


most of the lines are self explanatory.

Though I would explain the logic involved:

text.upper() converts the entered text to uppercase in order to unify the input text.

ord() returns the ASCII value of the argument character.
ord('A') is 65 and ord('Z') is 90, and chr(x)returns the ASCII character with ASCII value x.
i.e. ord(66) is 'B'

I used a logic to mirror the alphabet by using expression 155-ord(ch) which evalutes to 90 if ord(ch) is 65 and vice versa for all characters between 'A' and 'Z' just what we want.155 comes from the sum of the two extreme charactersASCII(65 and 90).and chr() is used to convert back to character.


SO YOU KNOW THE MIRROR CYPHER.

This can be used in any form you want,like  a function or whatever.Comments are invited.And I will discuss more on cyphering if necessary.

Inspired from : Hacking Secret Ciphers With Python


Python Syntax : How to code in python?

Python is easy peasy to learn,if you know how to code in any other programming language then it is going to be a cakewalk for you to learn Python.

And ones again I am not going to teach you how to code in python from the scratch.There is probably a million other websites to do that for you(or me),instead I am going to provide you some quick links from which you can be a pro in python in no time.

Learn online :

www.codecademy.com teaches you python from the scratch,don't worry if you haven't installed the python interpreter on your computer.The website has a built-in interface to teach you python.You can work out your code on the Codecademy Labs anywhere in the world on computer with internet.Actually codecademy have tutorials in other languages too.forgot to mention it is FREE

Books on Python:

O'Reilly (http://oreilly.com/python/)have some of their excellent books on python for range of users who use python for fun as well as experts

For beginners  I suggest

Non-free:

From the headfirst series : Head First Python by Paul Barry (http://shop.oreilly.com/product/0636920003434.do) and Programming Python by Mark Lutz(http://shop.oreilly.com/product/9780596158118.do)

Free books:

Check out http://inventwithpython.com/IYOCGwP_book1.pdf  which teaches you how to make your own games with python

So all set(after you know hoe to code in python),Let's dive into my experiments.


Taking the python out of the hat...

I  am here going to give a short intro about Python from what I have learnt so far,and then am going to directly dive into python.

Python is a very high level language(VHLL),that means we  have to write fewer lines of code than other high level languages like C/C++. Hence,python provides a quick programming platform to people of any age or skill level.And another thing is that it is available for FREE.

Python' scope is not just limited into the programs running on computers alone,it can also be used to interface with hardware circuits connected to your computer.

One thing that is worth noting is,python being a VHLL it may under perform  when compared to codes written in C/C++,on the basis of speed.

How to install python on your computer :

I am not going to explain these easy tasks in this blog just to fill up the space.
Just visit www.python.org which explains these tasks in authentic way.


Introduction

This blog is all about my experiments involving the Python Programming language...

Most of these projects are done on the Python2.7 version,though they can be easily converted to python3 versions also.